

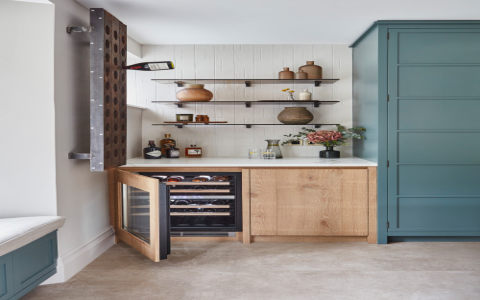
Alright, so I’ve been meaning to share this little project I tackled. You know how some spots in your house just bug you? Well, I had this weird, empty nook in our entertainment room, and it just felt like wasted space. Plus, I really wanted the whole room to feel more… together. Like one complete entertainment zone, not just a room with a TV and some chairs. My goal was to make whatever I built look like it was always part of the main entertainment center, almost identical in feel, to tie the whole room together.
Figuring Out What to Do
First thing I did was stare at that nook for a good long while. Then, I grabbed my trusty tape measure and got all the dimensions down. Accuracy here is key, folks, learned that the hard way on other projects. I wasn’t going for anything super complicated, just a solid cabinet that could serve as a mini-bar area or just extra storage, but it had to look like it belonged with the existing entertainment unit. I sketched out a few rough ideas on a piece of scrap paper – mostly boxes and shelves, nothing fancy. The main thing was to match the height and general style of the other furniture in the room to get that “identical entertainment room” vibe I was aiming for.


Getting the Materials
Off to the hardware store I went. I decided on some decent quality plywood for the main box and shelves, and some sturdy 2x4s for an internal frame, just to make sure it was solid. You don’t want your bottles or glasses taking a tumble, right? Grabbed a box of screws, some wood glue – the good stuff – and then spent way too long in the paint aisle trying to find a color that would match our existing entertainment center. That was a whole mini-project in itself!
- Plywood sheets (went for a smooth finish)
- 2×4 lumber for framing
- Wood screws (various sizes)
- Wood glue
- Sandpaper (different grits)
- Primer and Paint (the “matching” color)
- Some basic L-brackets for extra shelf support
The Build Process – Getting My Hands Dirty
Okay, so back home, I cleared out a space in the garage. First up, I built the basic frame. I cut the 2x4s to size and screwed them together to make a sturdy base and uprights. I wanted this thing to be rock solid. Measure twice, cut once is the mantra here, though I’ll admit I sometimes only measure once and then kick myself later.
Once the frame was solid, I started cutting the plywood for the outer shell and the shelves. This is where my little sketch came in handy. I attached the side panels to the frame, then the top. For the shelves, I measured carefully inside the assembled box and cut them to fit snugly. I used a combination of screws and wood glue for pretty much everything, wiping off any excess glue as I went. For a couple of the wider shelves that I thought might hold heavier stuff, I added some small L-brackets underneath for peace of mind. You can’t really see them unless you’re looking up from the floor.
I also decided to add a back panel, just some thinner plywood, to close it all in and give it a more finished look. It also helps with the overall sturdiness, I think.
Finishing Touches – Making it Pretty
After everything was assembled, it was time for the not-so-fun part: sanding. I sanded everything down, starting with a coarser grit and moving to a finer one to get it nice and smooth. Wiped all the dust off thoroughly. This step is a pain, but it makes a huge difference to the final paint job.
Then came priming. One good coat of primer, let it dry completely. Then, finally, the paint. I did two coats of the color I’d painstakingly picked out. I really took my time with this, trying to get an even finish that would match the other furniture. This was crucial for that “identical entertainment room” look I was after. It’s amazing how paint can transform a bunch of wood into something that looks like real furniture.
The Final Result
After the paint was fully cured, I carefully moved the new cabinet into the entertainment room nook. And honestly? It fit like a glove! It looked like it had always been there. The color match was pretty spot on, and the style, while simple, blended right in with the main entertainment center. That dead space is now a functional, good-looking bar nook cabinet. It really helps complete the room, making the whole entertainment area feel more cohesive and intentional.
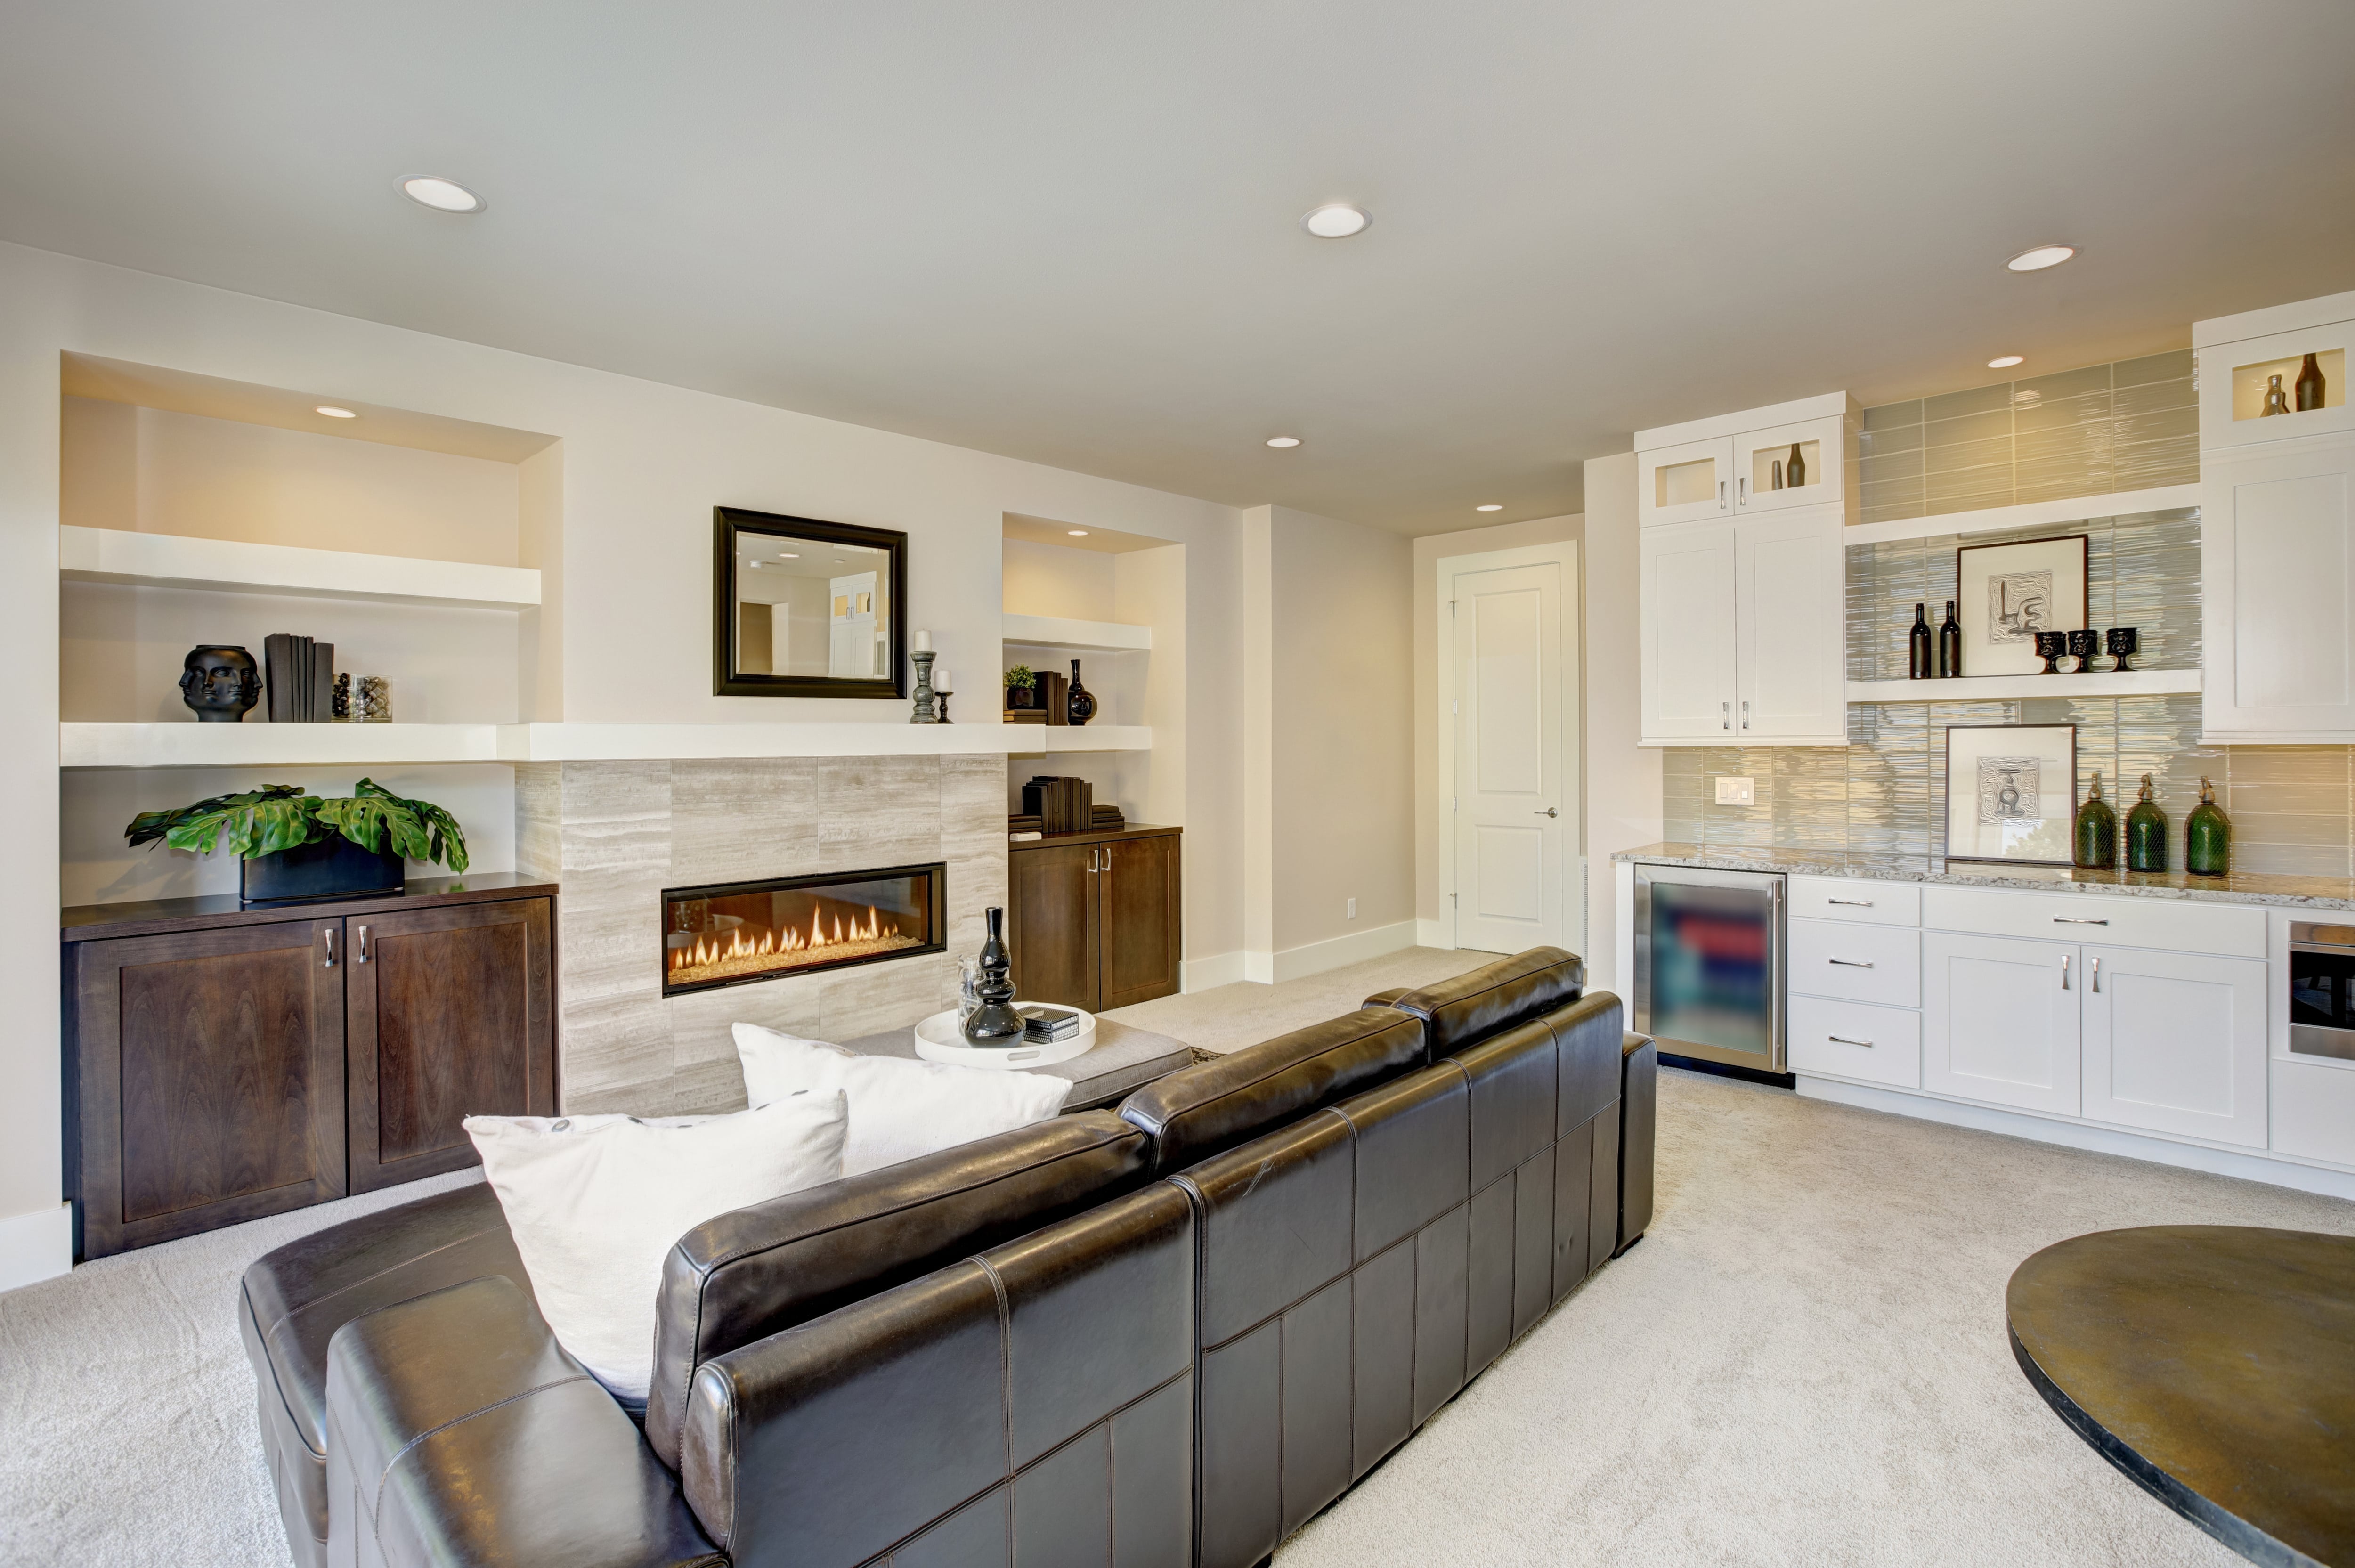
It took a weekend and a bit of elbow grease, but I’m super happy with how it turned out. It’s not perfect, I can see a few tiny flaws if I look really close, but hey, I made it! And it does exactly what I wanted it to do: fills that awkward space and makes the entertainment room feel whole. Totally worth it.


